AI-Powered Key Takeaways
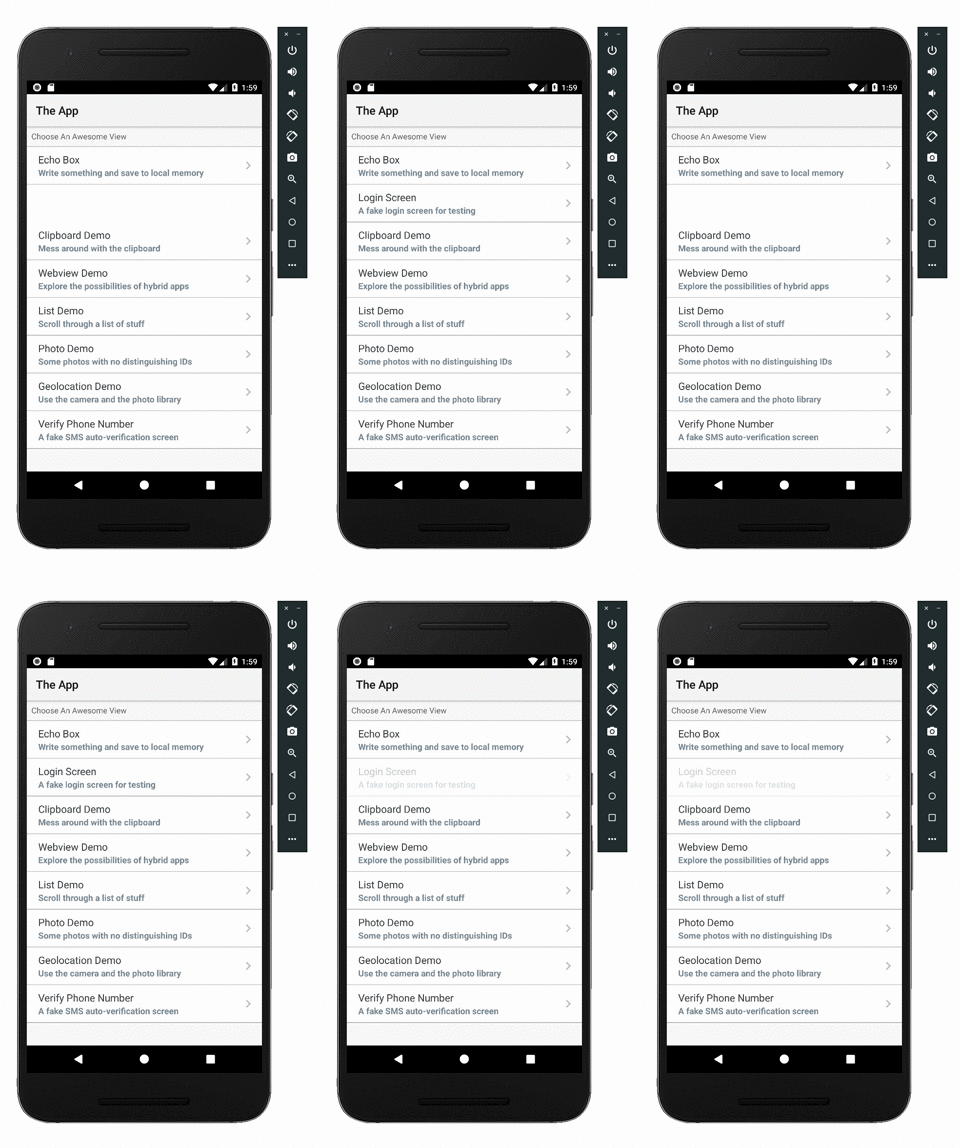
As we near some long holiday time in many parts of the world, no doubt many of you are seeing twinkling and flashing lights around your neighborhoods. Appium has also recently learned how to make elements twinkle and flash! And this is not only a way to add sparkle to your test runs, but it can be a useful technique for debugging errors.

It can happen, for example, that when you find an element, you may not have a reference to the element you think you have. This might especially be true in the case of XPath locators which aren't robust enough---the locator might still get you back an element, but for all you know it is now a completely different element.
In some cases, this would be apparent by getting the text of the element. In other cases, the only way to tell if you have the right element would be to change its visual appearance so you can manually inspect it. With Appium's Espresso Driver, this is now possible! How does this magic work? Because Espresso as a framework allows white-box testing, the Appium Espresso driver actually has access to the elements inside your app---not just an accessibility-powered representation of those elements.
We can therefore apply animations and other changes to elements that you've found, and this is precisely the point of the new mobile: flashElement command (available in the latest Appium beta). Basically, it takes an element reference and two other parameters, one for the duration of a single flash animation, and one for the number of times you wish the animation to be repeated. This gives you the flexibility you need to make sure the animation is visible in a video recorded of the session, or as you manually inspect your app.
Using the command is pretty simple. Let's say we have a WebElement object found and stored in a variable el. Then, we can do the typical mobile: method dance:
In this case, we will wind up with a series of quick flashes that takes about 2 seconds to complete. You can play around with these values to suit your liking.
That's all there is to it! This is a fun and moderately useful example of how leveraging Appium's new Espresso driver can make your life as a tester a tiny bit easier. As a full example, see the code below. Notice that I have included Android keystore-related capabilities; this is because I am using a signed release APK, and in this case it is a requirement that Appium's Espresso server and the test APK be signed with the same key. I thus need to tell Appium which key I used to sign my app so it can sign the Espresso server with it as well. If you're simply running a debug APK, you probably don't need to do this, but I include it because no doubt many of you will want to test release APKs.
And as always, you can check out the code in the context of a working testsuite on GitHub.


.png)


-1280X720-Final-2.jpg)


