


.png)


.png)


AI-Powered Key Takeaways


Building apps and testing them requires heavy collaboration among various stakeholders at every step of the process. Monitoring, compiling, and sharing session data manually with each stakeholder after every run’s completion can be a nightmare. If we could instead send the session data as alerts through a communication tool, it would reach a larger audience at one go.
Slack, the team communication tool for almost all organizations, allows users to insert alerts at the end of automation scripts. Once the script finishes executing, the session data is automatically collected and broadcast to the selected user(s) or channel(s).
Users can send alerts through Slack using Webhooks or Slack APIs and can also attach files to them. The first step to sending alerts through either of the above methods is to create a Slack app.
By creating a Slack app, users get access to a vast array of Slack’s functionalities, of which sending automated alerts is just one. Creating a Slack app at the organizational level allows the entire organization to receive alerts and notifications as they wish. Refer to this quick guide to create a Slack app.
Using Webhooks to Send Alerts in Slack
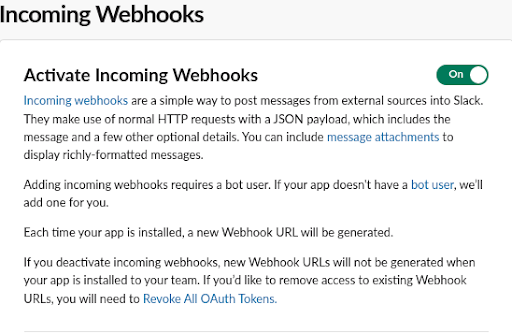
Incoming Webhooks are the simplest way to send alerts from apps to Slack.
Steps to create Slack alerts using Webhooks:
Step 1: Create a Slack app (refer to this guide if you haven’t already).
Step 2: Enable the Incoming Webhooks functionality in the Slack app to allow it to post alerts from external sources in Slack.
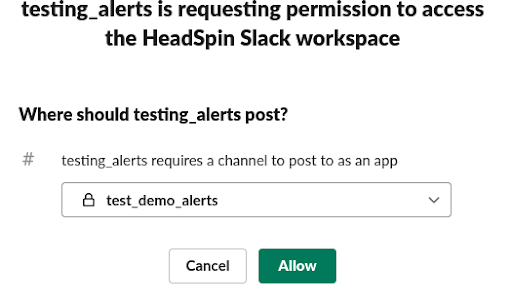
Step 3: After enabling Incoming Webhooks, add a new webhook to your workspace. Select the Slack channel in which you want the app to send alerts.
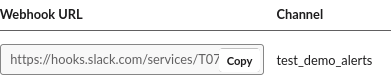
Step 4: A webhook URL will be generated specific to the channel that you select.
Step 5: Once the webhook URL has been generated, you can add your alert to the URL using the HTTP POST request.
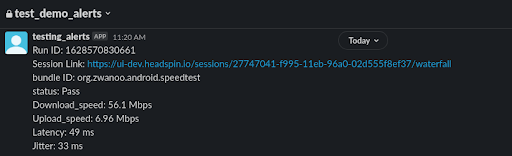
Step 6: The app will post the alert to the channel that you picked, for which the webhook URL was generated. The alert will look as below:
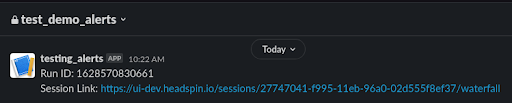
The above alert has the ID of the session that finished running, along with its link. Members of that channel can click the link to view the session logs and other details.
Using Post Message Slack API to send alerts
While Incoming Webhooks are an easy way to publish alerts in Slack, they are limited in their functionality. For example, Webhooks allow users to broadcast messages but not to modify or delete them after publishing them. They also do not allow users to override the initial channel preference for which they created the Webhook URL.
The chat.postMessage method is much more advanced in terms of functionality and scope. They enable apps to reply to messages, broadcast the same message on multiple channels, etc.
Steps to create Slack alerts using postMessage API:
Step 1: Create a Slack app (refer to this guide if you haven’t already).
Step 2: Go to app settings from the app management page and choose the OAuth & Permissions feature from the navigation menu. Scroll down to the Scopes section and pick chat:write from the dropdown menu. This scope will enable the app to send messages on its behalf.

Step 3: If the app doesn’t have the above scope granted to it previously, you will have to reinstall the app to its original workspace using Reinstall App.
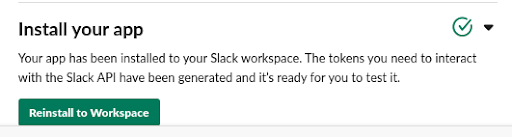
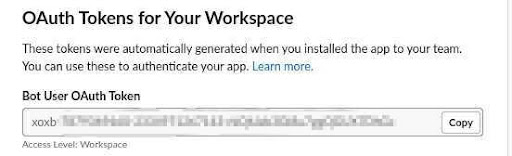
Step 4: Workspace tokens are required to use any Slack API. A workspace token gets generated when a user installs the app in the workspace for the first time and becomes available in the app settings under “Bot User OAuth Token.” For the API to work, the token needs to have the right permissions.
Step 5:
- The Python snippet requires an argument channel to find the right conversation.
- The argument text specifies the alert’s content.
- The Python snippet for posting an alert using chat.postMessage API from a Slack Web Client will be as below:
from slack import WebClient
Step 6: The app will post the alert to the channel that you picked, for which the webhook URL was generated. The alert will look as below:
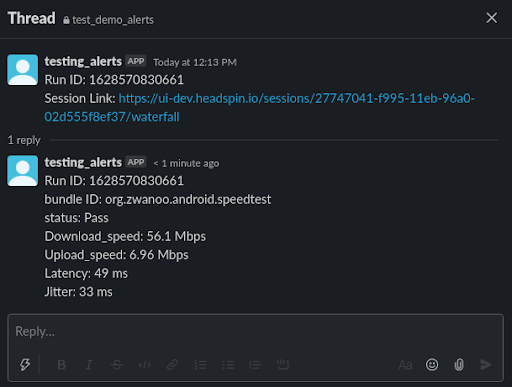
Step 7: You can use the argument thread_ts to send the alert as a reply to a previous message. This command comes in handy when the alert is related to the previous message and must be posted without creating confusion.
from slack import WebClient
Step 8: You can make the alert appear as a threaded reply to a message by providing the argument thread_ts with the ts value of the parent message. You can obtain the ts value from the response payload you get when sending the parent message.
Posting Attachments in Alerts
Slack allows users to upload files as messages, along with text messages, or even as a reply to a message thread. You tag pictures, logs, and other artifacts to alerts that are broadcast post the session’s run. files.upload is the API method used to upload attachments to Slack.
Steps to attach files to Slack alerts using files.upload API:
Step 1: Create a Slack app (refer to this guide if you haven’t already).
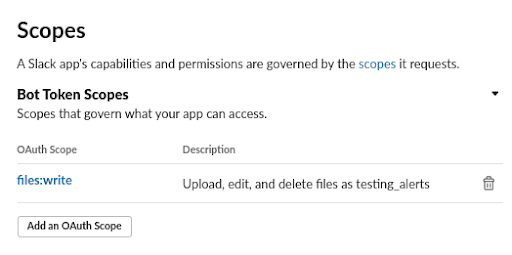
Step 2: Go to app settings from the app management page and choose the OAuth & Permissions feature from the navigation menu. Scroll down to the Scopes section and pick files:write from the dropdown menu. This scope will enable the app to send messages on its behalf.
Step 3: If the app doesn’t have the above scope granted to it previously, you will have to reinstall the app to its original workspace using Reinstall App.
Step 4: Workspace token arguments are required to use any Slack API. For the API to work, the token needs to have the right permissions.
Step 5:
- The Python snippet also requires an argument channel to find the right conversation. You can add multiple channels with comma-separated lists.
- You can use the argument initial_comment to specify any comment related to the alert.
- The argument title gives the attachment a title.
- You must mention the needs of the attachment’s path in the argument file.
Step 6: The Python snippet for uploading a file using files.upload API from a Slack Web Client is shown below:
from slack import WebClient
Step 7: Some additional arguments help use thread functionality in Slack.
- You can use an argument thread_ts to attach the file to the corresponding session alert.
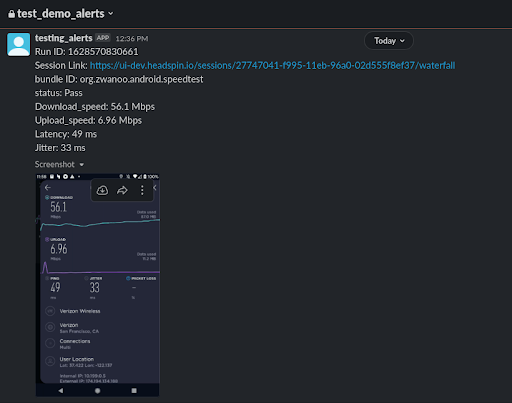
The app will post the attachment to the channel that was selected using the channel argument with the details provided in initial_comment as shown below:
Slack Notification Integrated Code
Using the start HeadSpin capture, the following Python code template shows how to associate a test with the User Flow, and set the status (depending on the success or failure of the automation script). The code pushes notifications containing the session link to Slack using the postMessage API.
Summary
Using the methods described above, users can avoid the hassle of manually monitoring sessions and instead get the session data delivered directly to their Slack channel. They can choose between Webhooks’ simple but restricted functionality or more advanced API methods with larger functionality like chat.postMessage and files.upload.
FAQs
Q1. What is the purpose of using webhooks?
A1. Webhooks are lightweight APIs that power one-way data sharing triggered by events. They enable apps to share functionality and data.
Q2. What is the difference between API and webhook?
A2. Webhooks do not send requests to get responses, while APIs demand requests for responses. Simply put, API retrieves, webhooks receive.
Q3. What are the four types of API?
A3. The four main types of APIs are:
- Public
- Partner
- Private
- Composite
Q4. What is a webhook endpoint?
A4. A webhook endpoint is a URL to which a webhook makes an HTTP callback. This URL needs configuration by the system receiving the data.


-1280X720-Final-2.jpg)


