


.png)


.png)


AI-Powered Key Takeaways


When I was working on a first-pass automation of a login flow for the Twitter Android app as part of Automation Happy Hour Episode 6, I ran into an interesting problem, which is illustrated by the screenshot below.
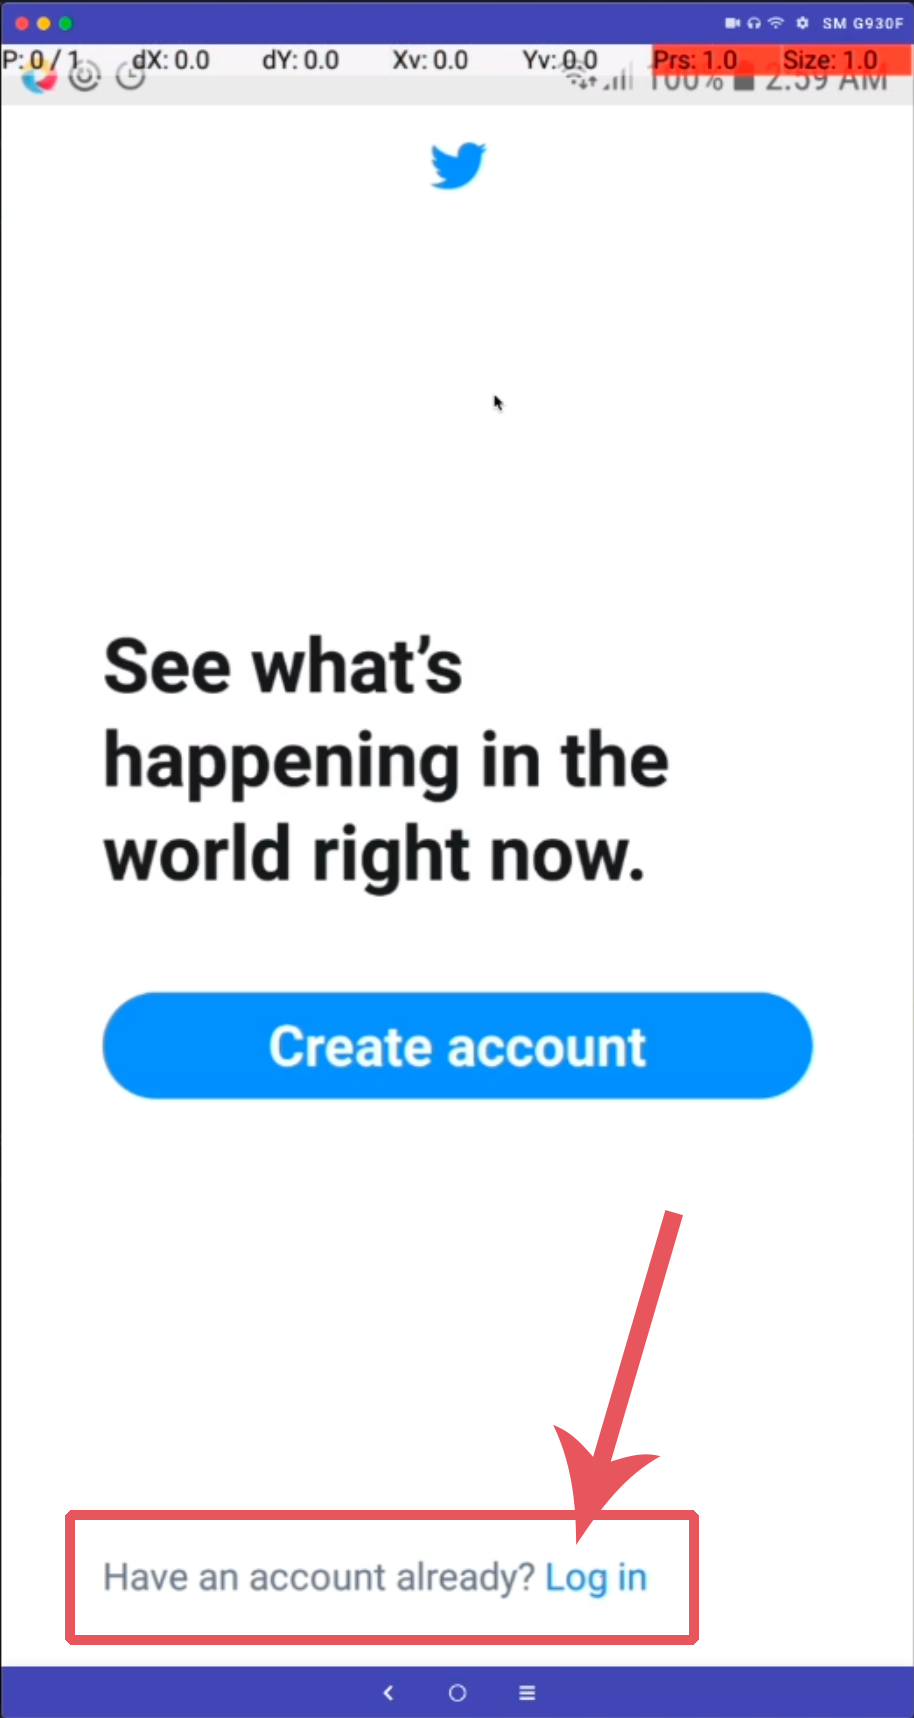
To get from the splash page to the login page, I needed to have Appium tap this "Log in" button. The only issue was, the button and the preceding text were all part of a single element. I could find the element, but when I used element.click() on it, nothing happened.
At first, I thought this was one of those cases where the element is not appropriately responding to the behavior of the click command. In such cases, it's often useful to make use of something I call a "tap by location" helper. This is a little helper method that makes it easy to tap an element using the Actions API, instead of finding an element reference and calling element.click() as you normally would. Here's the basic approach:
- Find the element object
- Determine the position of the top-left corner of the element on the screen
- Determine the width and height of the element
- Use the result of #2 and #3 to find the midpoint of the element in terms of screen-based X and Y coordinates
- Use the Actions API to generate a tap at those coordinates
In code, it would look something like this, added to your base page object model:
Basically, we create a generic tapAtPoint method which handles turning a Point object into an Actions tap at that point. Then, we create the actual helper, tapElement, which does all the math for finding the midpoint of an element. To accomplish this it makes use of the getRect method for WebElements, since that method returns to us both the X and Y location of the top-left corner of the element, and the dimensions. To find the midpoint, we just divide the width and height by 2, and add those quantities to the X and Y values for the top-left corner, respectively.
Now, in our test code, we can use the helper as follows (using an element from TheApp as an example):
So I used this approach with the Twitter app, and things still didn't work. What could be going on? Ultimately, I realized that it wasn't enough to just tap the element containing the 'Log in' text---I needed to tap that text specifically, even though it was all part of the same element as far as Appium was concerned. To make this possible, we would need to update our tapElement method, or more accurately, create a new helper method called tapElementAt. We need the ability to tap an element at an arbitrary distance from the top-left corner, and not just at the midpoint. So here's the set of helper methods we end up with when we make that addition and refactor:
Now, tapElement becomes just a special case of tapElementAt, with hard-coded values for the element-relative locations to tap. Notice that we are using relative percent values to pass into tapElementAt, rather than pixels. This makes it easy for us to eyeball the element regardless of screen size, and enter values that make sense. For the Twitter app above, I ended up writing the equivalent of:
This generated a tap 90% of the way from the left edge of the element (so just 10% in from the right edge), and 50% down from the top (so right in the vertical middle). And this did the trick! I recommend adding this kind of element tap helper to your framework for situations you encounter like this. And if you want to see these methods in action, head on over to the example source code for this edition.


-1280X720-Final-2.jpg)


