


.png)


.png)


AI-Powered Key Takeaways


Espresso is an Android test automation library maintained by Google. It has a number of advantages, for example built-in view synchronization that ensures element finding happens during idle periods in your app. (Curious to learn more about Espresso and how it compares to Appium and other frameworks? Check out my webinar, The Shifting Landscape of Mobile Automation for a more in-depth discussion). Most people assume Espresso is an alternative to Appium; you'd pick either Appium or Espresso, not both. That's pretty much been the case, up until now.
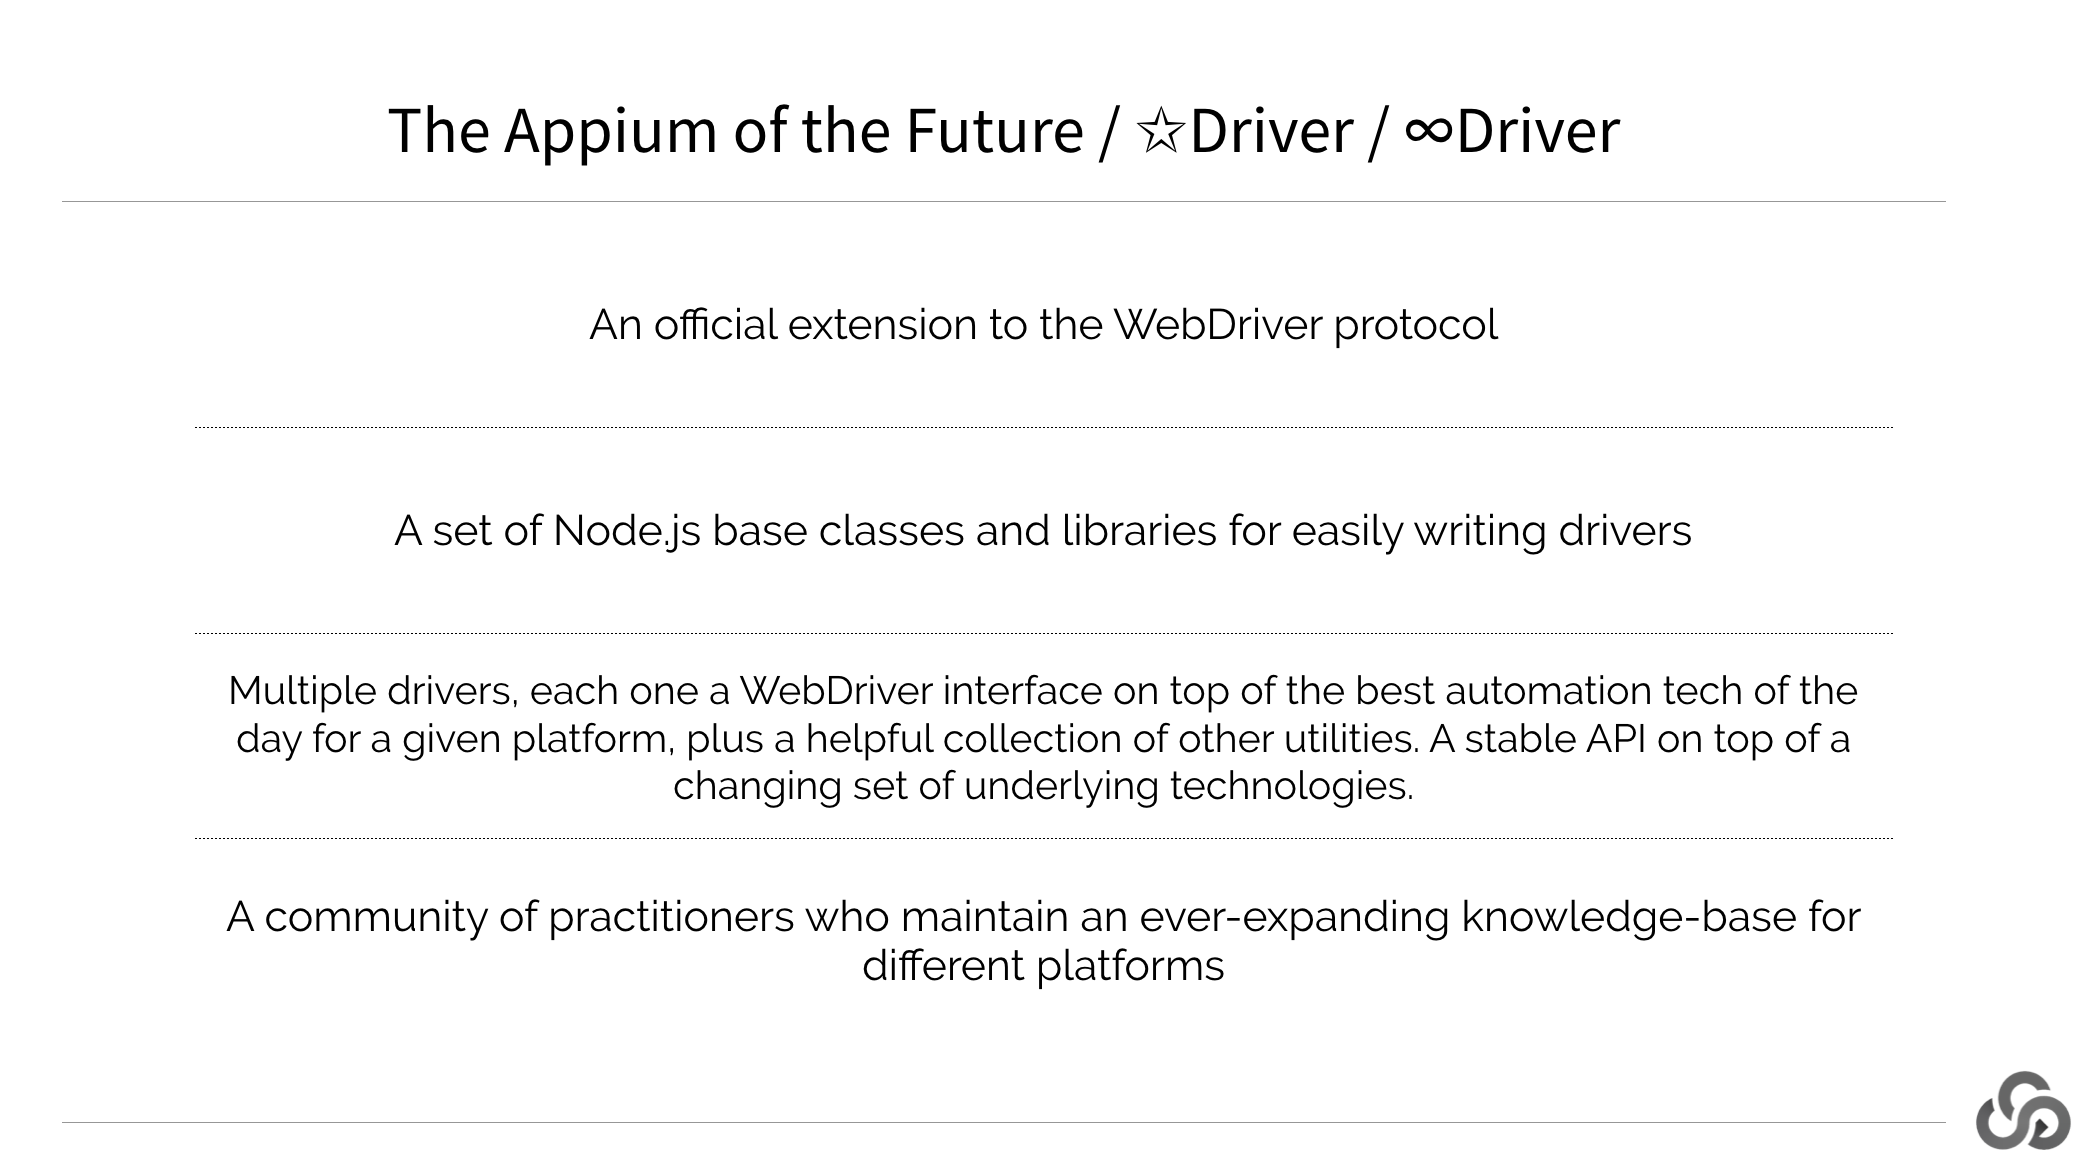
Part of Appium's vision is the incorporation of any good technology into Appium itself. Our goal with Appium is not to compete on fundamental automation technology, when what exists is good. Instead, our vision is of a single, unified API for all app automation, based on the official WebDriver spec. As I put it in the aforementioned webinar, here's what I think the Appium of the future looks like:
From this perspective, there's nothing odd about creating an Appium Espresso driver. And that is exactly what we've done. For some time we've been working on a very rough beta (really alpha) version of an Appium driver that runs Espresso under the hood. This means the same kind of Appium script you're used to writing, but running on Google's top-tier automation technology. This new driver is still in its infancy, and is not recommended for production. However, the beta is moving along enough that I think it's time more people had a chance to play with it. In this article, we'll see exactly how to do that!
Check: A Complete Guide to Getting Started with Espresso
In essence, it's pretty simple: we just change the automationName capability to Espresso (instead of, say, UiAutomator2 if you're using the current standard Android driver for Appium). By designating this automation name, Appium will know to start an Espresso session instead of something else. The Appium Espresso driver is so new, however, that you will really need to be running Appium from source (by cloning the GitHub project and running npm install to get the latest dependencies, including the latest Appium Espresso driver), or running the latest Appium beta (npm install -g appium@beta). At this point, simply running appium (or node . if running from source) will spin up an Appium server that knows about the most recent Appium Espresso driver beta.
Also check: Starting Appium Server Using AppiumServiceBuilder
The best way to show off what you can currently do with the Espresso beta is with a comparison. The code for this article is therefore the same test (of a basic login flow) run on both UiAutomator2 and Appium Espresso drivers. Let's take a look at the code for the standard UiAutomator2 driver first:
The first thing to observe about this snippet is that we have a helper method, getDriver, which simply takes the automation name and gets us an instance of AndroidDriver. This is so we can reduce code duplication when we do the same thing for the Espresso version of the test (and to show that all the capabilities are the same, other than automationName). Next, we set up 3 expected conditions for user later on in the test. Finally, our test flow itself is 5 steps long, utilizing pre-defined locator fields like password. The steps themselves should be familiar from other articles: (1) get to the login prompt, (2) enter the username, (3) enter the password, (4) tap the log in button, and (5) verify that an element with the correct logged-in text is present.
Read: Understanding Appium Drivers
So far, so good! Now let's take a look at the same test, but written for the Appium Espresso driver:
Can you spot the differences? There are just two:
- We only need 1 explicit wait instead of 3
- We have a different verification element we're looking for in the last step
Otherwise, the test code is exactly the same! This is great, because it means that, for the most part, changes were not required to migrate this particular test to the Espresso driver. Now, why do we only need 1 explicit wait instead of 3 as before? We needed them in the UiAutomator2 example because any time we try to find an element after a view transition, we have no guarantees about the timing of when the new view will show up, and we have to hedge our bets with an explicit wait. One of the benefits of Espresso, however, is synchronization, which as I explained before means that Espresso itself will hold off on finding any elements until it believes the app is in an idle state. What this means is that, for the most part, we don't need to worry about waits in Espresso! (We do still need the first wait because synchronization is not in effect until the app itself is fully loaded and instrumented by Espresso, and Appium doesn't know exactly when that happens).
Improving the Appium testing experience using HeadSpin. Learn more.
The second difference we mentioned was that we needed a different verification locator. What are these two locators and how do they differ? Here is how they are defined as fields on the test class:
Interestingly, the Espresso driver has access to app-internal class names. We can tell, for example, that I used React Native to develop the test application, whereas with UiAutomator2, all we know is that we have a text view of some kind. This specificity in the Espresso driver is nice, but it comes potentially at a cost of reducing the cross-platform nature of the element class names. The Appium team will be looking into ways to sort this out as we move forward with work on the Espresso driver beta. Meanwhile, we also note that if we wanted, we could have written a more general XPath query that works across both drivers (something like //*[contains(@text, 'alice')]).
Read: Writing XPath Queries That Work
Other than the view change synchronization, are there any other benefits to using the Espresso driver? In my experiments so far, it appears to be about 25% faster than the UiAutomator2 driver, though it would take a fair amount of work to ensure a "clean-room" environment for the experiment and corroborate that figure.
So, if you like living on the cutting edge of Appium and mobile automation, I encourage you to check out the Espresso driver. No doubt you will find that it doesn't work quite as you expect in one (or many) ways. That's part of why I'm directing you to try it; I think we're in a state now where we could really use some solid feedback and bug reports! So, fire it up and let us know on the Appium issue tracker if you encounter any issues. You can also follow along with the Espresso driver development on GitHub.
The full code for the comparison tests we looked at in this article is below, and as always can be found on GitHub as well.


-1280X720-Final-2.jpg)


